
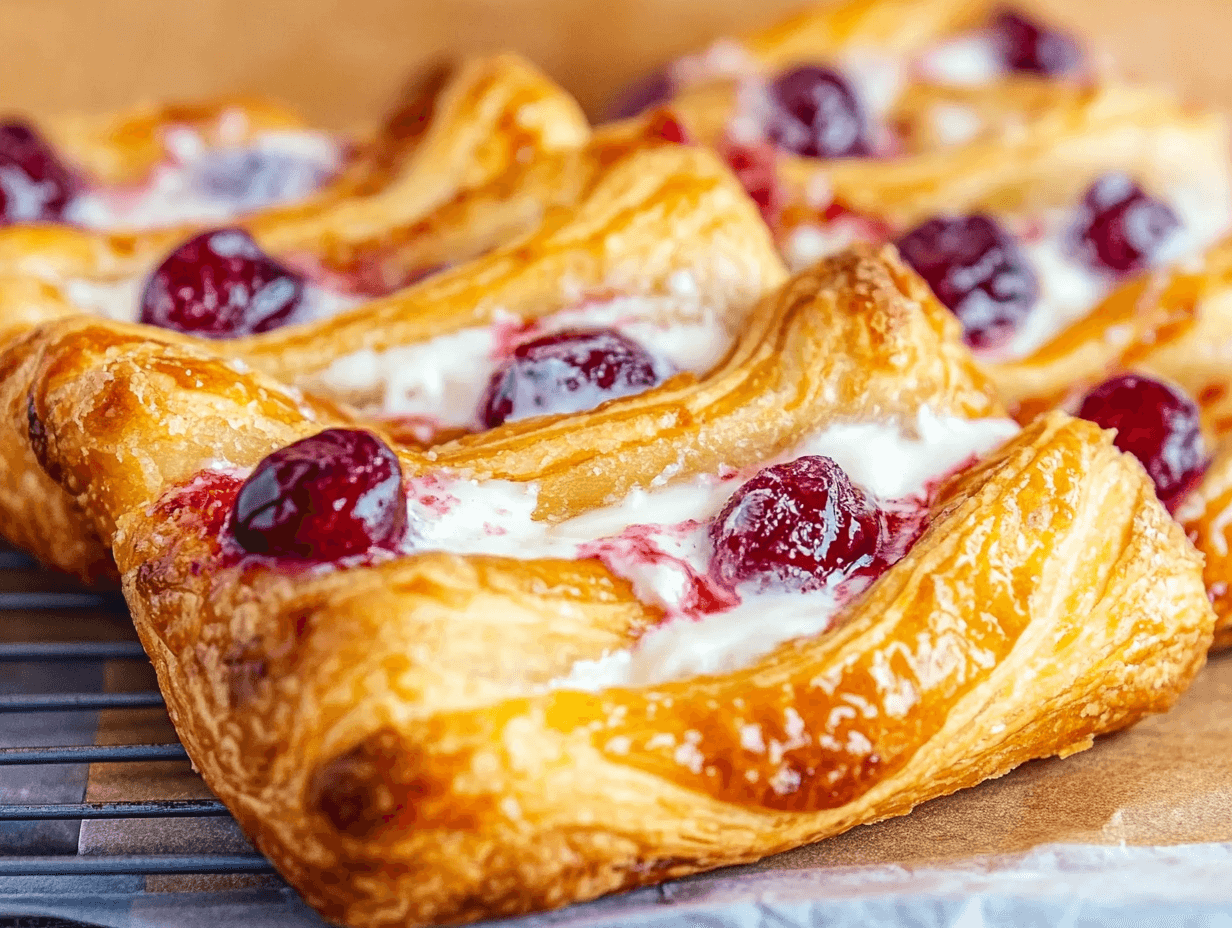
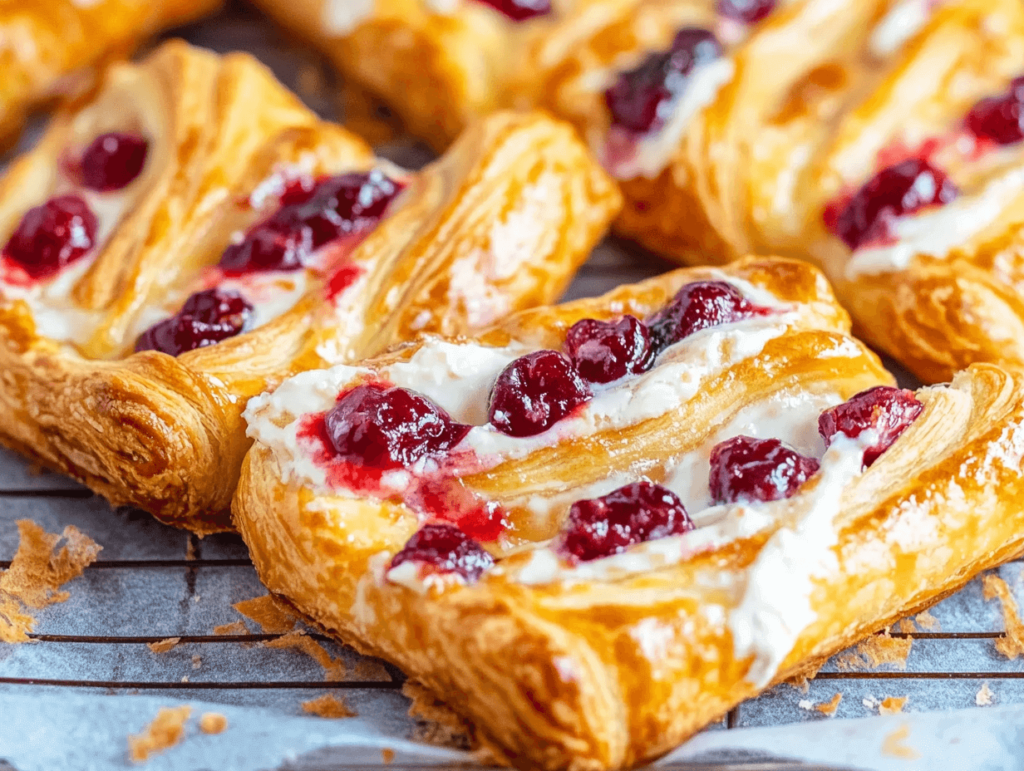
The Cream Cheese and Cherry Danish is a beloved pastry that perfectly balances rich, tangy cream cheese with the sweet-tart flavor of cherries. Encased in buttery, flaky pastry, it offers a delightful contrast of textures—crispy on the outside, soft and creamy inside. Whether enjoyed as a morning treat, a brunch centerpiece, or a comforting dessert, this Danish never fails to satisfy.
Table of Contents
The Perfect Blend of Flavors and Textures
What makes this pastry truly special is the way the ingredients complement each other. The buttery layers of pastry create a crisp bite, while the smooth cream cheese filling adds richness. The cherries provide a fruity brightness, cutting through the richness with a pop of tart sweetness. When baked to golden perfection and drizzled with a light glaze, it becomes an irresistible indulgence.
History of Danish Pastries
How the Danish Became a Breakfast Staple
Despite its name, the Danish pastry actually has Austrian origins. In the 19th century, Austrian bakers introduced laminated dough techniques to Denmark, revolutionizing the local pastry scene. Over time, Danish bakers refined these techniques, creating their own unique variations, including the beloved cheese and fruit-filled pastries that are now a staple in bakeries worldwide.
The Origins of the Cream Cheese and Cherry Combination
The combination of cream cheese and cherry filling in a Danish pastry is a relatively modern twist. While traditional Danish pastries were often filled with custard or fruit preserves, American and European bakers began experimenting with cream cheese as a filling in the 20th century. The slight tanginess of cream cheese paired beautifully with sweet cherries, creating a flavor profile that quickly became a favorite. Today, this classic pairing is enjoyed in bakeries and home kitchens alike.
Essential Ingredients
Selecting the Right Puff Pastry
The key to a perfect Cream Cheese and Cherry Danish starts with high-quality puff pastry. Traditional Danish dough is a yeast-leavened laminated dough, but for convenience, pre-made puff pastry works beautifully. When choosing your pastry:
✔ Go for all-butter puff pastry – It delivers the richest flavor and flakiest layers.
✔ Keep it cold – Work with chilled dough to maintain its structure.
✔ Homemade vs. store-bought – If making from scratch, ensure proper laminating for crisp layers.
Choosing the Best Cherries
Cherries bring the perfect sweet-tart balance to this pastry. Depending on what’s available, you can use:
✔ Fresh cherries – Pitted and slightly cooked with sugar to enhance flavor.
✔ Frozen cherries – A great option; just thaw and drain excess liquid before using.
✔ Cherry preserves or jam – A quick alternative for a hassle-free filling.
✔ Tart vs. sweet cherries – Tart cherries (like Montmorency) provide the best contrast against the rich filling.
The Secret to a Smooth, Creamy Filling
The cream cheese filling is the heart of this pastry. For the silkiest texture:
✔ Use full-fat cream cheese – It provides a rich, creamy consistency.
✔ Let it soften at room temperature – This ensures smooth blending without lumps.
✔ Mix with powdered sugar and vanilla – A touch of sweetness and vanilla enhances the flavor.
✔ Add a hint of lemon zest – For a slight tangy note that complements the cherries.
Equipment & Tools
Must-Have Baking Essentials
To achieve bakery-quality results, having the right tools is essential:
✔ Rolling Pin – For evenly rolling out homemade dough.
✔ Sharp Knife or Pizza Cutter – For cutting precise pastry shapes.
✔ Mixing Bowls & Hand Mixer – To create a smooth, creamy filling.
✔ Baking Sheet & Parchment Paper – For even baking and easy cleanup.
✔ Pastry Brush – To apply egg wash for a golden-brown crust.
✔ Sieve or Sifter – For dusting powdered sugar evenly.
Alternatives for Homemade Pastry Preparation
If you don’t have a traditional setup, here are some alternatives:
✔ Food Processor for Dough – Speeds up mixing if making pastry from scratch.
✔ Glass Bottle as a Rolling Pin – Works in a pinch for rolling dough.
✔ Air Fryer for Small Batches – A quick way to bake Danish pastries if an oven isn’t available.
Step-by-Step Recipe
Ingredients List
For the Pastry:
✔ 1 sheet puff pastry, thawed (or homemade Danish dough)
✔ 1 egg, beaten (for egg wash)
✔ 1 tbsp water
For the Cream Cheese Filling:
✔ 4 oz cream cheese, softened
✔ 2 tbsp powdered sugar
✔ ½ tsp vanilla extract
✔ ½ tsp lemon zest (optional, for extra tang)
For the Cherry Topping:
✔ ½ cup cherry pie filling or fresh pitted cherries
✔ 1 tbsp sugar (if using fresh cherries)
✔ 1 tsp cornstarch mixed with 1 tsp water (for thickening fresh cherry mix)
For the Glaze (Optional):
✔ ½ cup powdered sugar
✔ 1 tbsp milk
✔ ½ tsp vanilla extract
Instructions for Baking the Perfect Danish
Preheat oven to 375°F (190°C) and line a baking sheet with parchment paper.
Prepare the cream cheese filling – In a bowl, mix cream cheese, powdered sugar, vanilla extract, and lemon zest until smooth.
Prepare the cherry topping – If using fresh cherries, cook them in a small saucepan with sugar and cornstarch mixture over medium heat until thickened. Let cool.
Roll out the puff pastry and cut into squares, rectangles, or circles.
Assemble – Place a spoonful of cream cheese filling in the center of each pastry, followed by cherry filling.
Shape the pastry – You can leave them open-faced, fold edges slightly, or create a classic braided Danish.
Brush with egg wash – Lightly coat the pastry edges for a golden, crisp crust.
Common Mistakes & Fixes
Pastry is too soggy? → Make sure the filling isn’t too runny and avoid overfilling. Bake until fully golden.
Danish isn’t flaky? → Keep the puff pastry cold before baking for better layering.
Filling is leaking out? → Don’t overfill, and slightly indent the pastry to hold the filling in place.
Pastry didn’t puff up? → Use all-butter puff pastry and bake at a high temperature.
Variations & Customizations
How to Make a Gluten-Free or Vegan Danish
✔ Gluten-Free Version – Use store-bought gluten-free puff pastry or make homemade gluten-free laminated dough.
✔ Vegan Danish – Use dairy-free cream cheese, plant-based puff pastry, and an aquafaba or almond milk wash instead of an egg wash.
Healthier Ingredient Substitutes
✔ Whole Wheat Puff Pastry – Adds fiber and a slightly nutty taste.
✔ Reduced-Sugar Filling – Use honey or maple syrup instead of sugar.
✔ Greek Yogurt Instead of Cream Cheese – For extra protein and a lighter texture.
Expert Baking Tips
How to Achieve a Flaky, Buttery Texture
✔ Use all-butter puff pastry – Butter creates the best layers and flavor.
✔ Keep the pastry cold – Chill your dough before baking to prevent spreading.
✔ Don’t overwork the dough – Handling it too much can make it tough.
✔ Bake at a high temperature – 375-400°F (190-200°C) ensures crisp layers.
✔ Use an egg wash – This gives the pastry a beautiful golden-brown finish.
Ensuring a Thick and Creamy Filling
✔ Use full-fat cream cheese – Low-fat versions may be too runny.
✔ Let it soften – Room-temperature cream cheese blends smoothly.
✔ Mix thoroughly but don’t overbeat – Overmixing can make it too loose.
✔ Chill before baking – This helps the filling hold its shape.
Frosting & Toppings
The Best Glaze for Danish Pastries
✔ Classic Vanilla Glaze – ½ cup powdered sugar + 1 tbsp milk + ½ tsp vanilla extract.
✔ Lemon Glaze – Add ½ tsp lemon zest for a citrusy twist.
✔ Cream Cheese Drizzle – Blend softened cream cheese with powdered sugar and milk for extra richness.
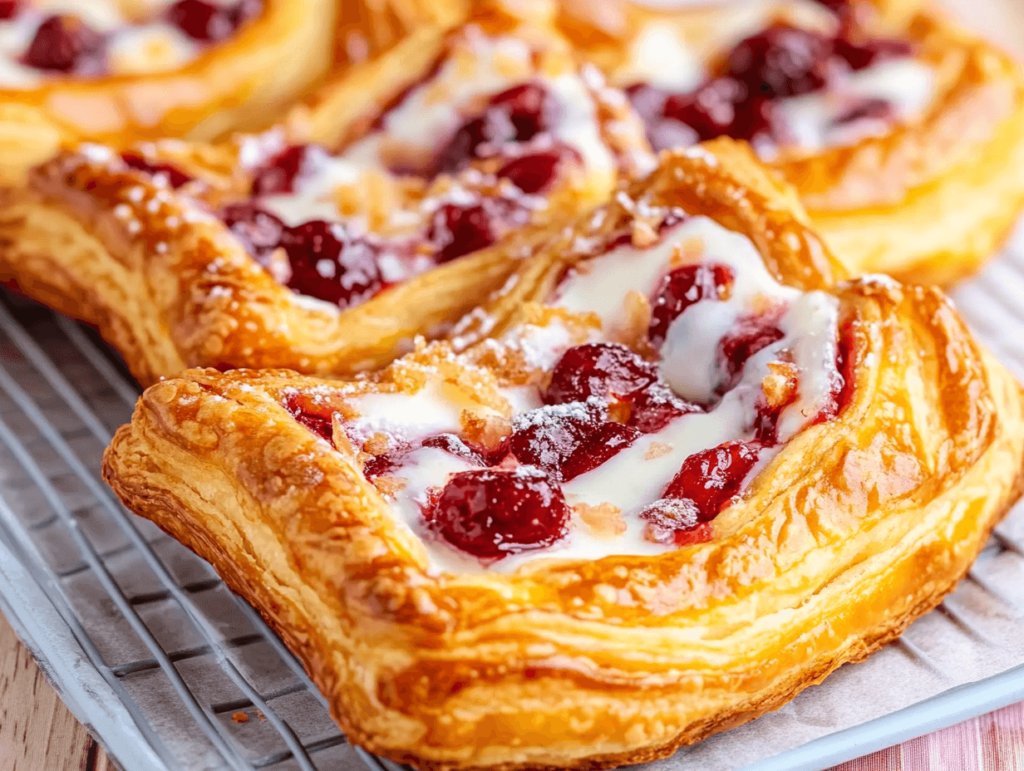
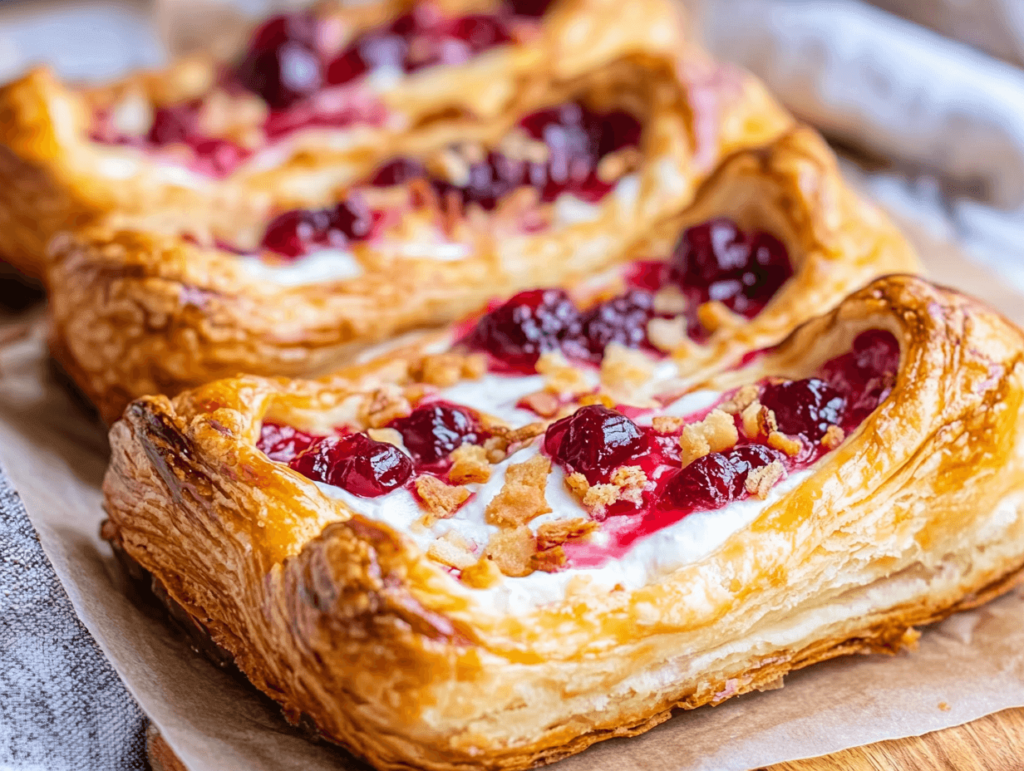
Creative Ways to Garnish Your Danish
✔ Slivered almonds – Adds crunch and a nutty flavor.
✔ Powdered sugar dusting – A simple, elegant finish.
✔ Chocolate drizzle – Pairs well with cherries for a decadent touch.
✔ Fresh fruit slices – Adds a burst of color and freshness.
Pairing Suggestions
The Best Drinks to Serve with a Danish
✔ Coffee – A bold espresso or cappuccino enhances the buttery pastry.
✔ Tea – Earl Grey, chamomile, or green tea complement the flavors well.
✔ Milk – A classic pairing that balances the richness.
✔ Fresh juice – Orange, cherry, or apple juice for a fruity contrast.
Special Occasions for This Classic Treat
✔ Brunch gatherings – A show-stopping centerpiece.
✔ Holiday breakfasts – Perfect for Christmas or Easter mornings.
✔ Afternoon tea – A sophisticated and delicious addition.
✔ Dessert tables – Impress guests with homemade Danish pastries.
Storage & Shelf Life
Keeping Your Danish Fresh for Longer
✔ Store in an airtight container – Keeps it fresh for up to 2 days at room temperature.
✔ Refrigerate for longer storage – Lasts up to 5 days but may lose some crispness.
✔ Reheat before serving – A quick warm-up in the oven (350°F for 5 minutes) restores texture.
Can You Freeze a Cream Cheese and Cherry Danish?
✔ Yes! Freeze individually wrapped Danish pastries for up to 3 months.
✔ To reheat, bake at 350°F (175°C) for 10-12 minutes or microwave for 30 seconds.
Nutritional Information
Caloric and Macronutrient Breakdown (Per Serving – Approximate)
✔ Calories: ~280-350
✔ Carbohydrates: 30-40g
✔ Fat: 15-20g
✔ Protein: 4-6g
✔ Sugar: 10-15g
The Benefits of Cherries and Dairy in Baking
✔ Cherries – Packed with antioxidants, vitamin C, and anti-inflammatory properties.
✔ Cream cheese – A good source of calcium and healthy fats.
✔ Butter – Provides essential fats for energy and enhances texture.
Common FAQs
Why Did My Danish Turn Out Too Soft?
A soft or soggy Danish is often caused by excess moisture or underbaking. Here’s how to fix it:
✔ Bake at the right temperature – Ensure your oven is preheated to 375-400°F (190-200°C).
✔ Use cold puff pastry – Warm dough won’t puff properly, leading to a dense texture.
✔ Drain cherries well – If using canned or frozen cherries, remove excess liquid before adding them.
✔ Don’t overfill – Too much filling can make the pastry too moist.
Can I Use Fresh Cherries Instead of Canned?
Absolutely! Fresh cherries offer a more natural and slightly tart flavor. To use them:
✔ Pit and chop fresh cherries before cooking.
✔ Cook them with 1 tbsp sugar and 1 tsp cornstarch over medium heat until thickened.
✔ Let them cool completely before adding them to the pastry.
How Do I Keep the Filling from Leaking?
✔ Don’t overfill – Use about 1 tablespoon of cream cheese filling and a small spoonful of cherry topping per pastry.
✔ Create a border – Leave a small edge of dough around the filling to prevent overflow.
✔ Chill before baking – Refrigerate the assembled pastries for 10-15 minutes before baking to help set the filling.
✔ Bake on parchment paper – This helps contain any minor leaks.
What’s the Best Puff Pastry Brand?
✔ Pepperidge Farm – Readily available and easy to work with, though made with shortening.
✔ Dufour – An all-butter, high-quality option for the best flaky texture.
✔ Trader Joe’s Puff Pastry – A great seasonal, buttery alternative.
✔ Homemade Puff Pastry – If you have time, making your own results in the best flavor and texture.
Can I Prepare the Danish Pastries in Advance?
✔ Yes! Assemble the pastries and refrigerate them unbaked for up to 24 hours before baking.
✔ Baked pastries stay fresh for 1-2 days at room temperature or up to 5 days in the fridge.
✔ Freeze unbaked Danish for up to 3 months, then bake straight from frozen, adding a few extra minutes to the baking time.
How Do I Get a Beautiful Golden-Brown Finish?
✔ Brush with egg wash – Use a beaten egg mixed with 1 tbsp water or milk before baking.
✔ Bake at a high temperature – 375-400°F (190-200°C) ensures crisp, golden layers.
✔ Use a convection oven if available – This helps with even browning.
✔ Let it bake fully – Underbaking can leave the pastry pale; wait until it turns deep golden brown.
For readers who enjoy flaky, buttery pastries, this Cream Cheese and Cherry Danish pairs beautifully with other classic baked goods. If you’re looking for a similar indulgent treat, try making almond croissants, which offer a nutty and buttery crunch. Chocolate lovers might also enjoy chocolate croissants for a rich, cocoa-infused alternative. If you’re following a gluten-free diet, don’t miss this gluten-free croissant recipe, which provides a fantastic wheat-free option. For a unique twist on laminated dough, you might also explore croissant bread or croissant bread loaf, which offer a delightful way to enjoy pastry-style textures in a loaf form. These recipes complement the Danish experience and provide great variety for home bakers.
Conclusion
The Cream Cheese and Cherry Danish is a perfect blend of flaky, buttery pastry, rich and creamy filling, and the sweet-tart burst of cherries. Whether enjoyed as a breakfast treat, a brunch showstopper, or a delightful dessert, this pastry offers a timeless indulgence that never fails to impress.
Now that you have all the tips and tricks, it’s time to get baking! Enjoy your homemade Danish and share the joy with family and friends. Happy baking!