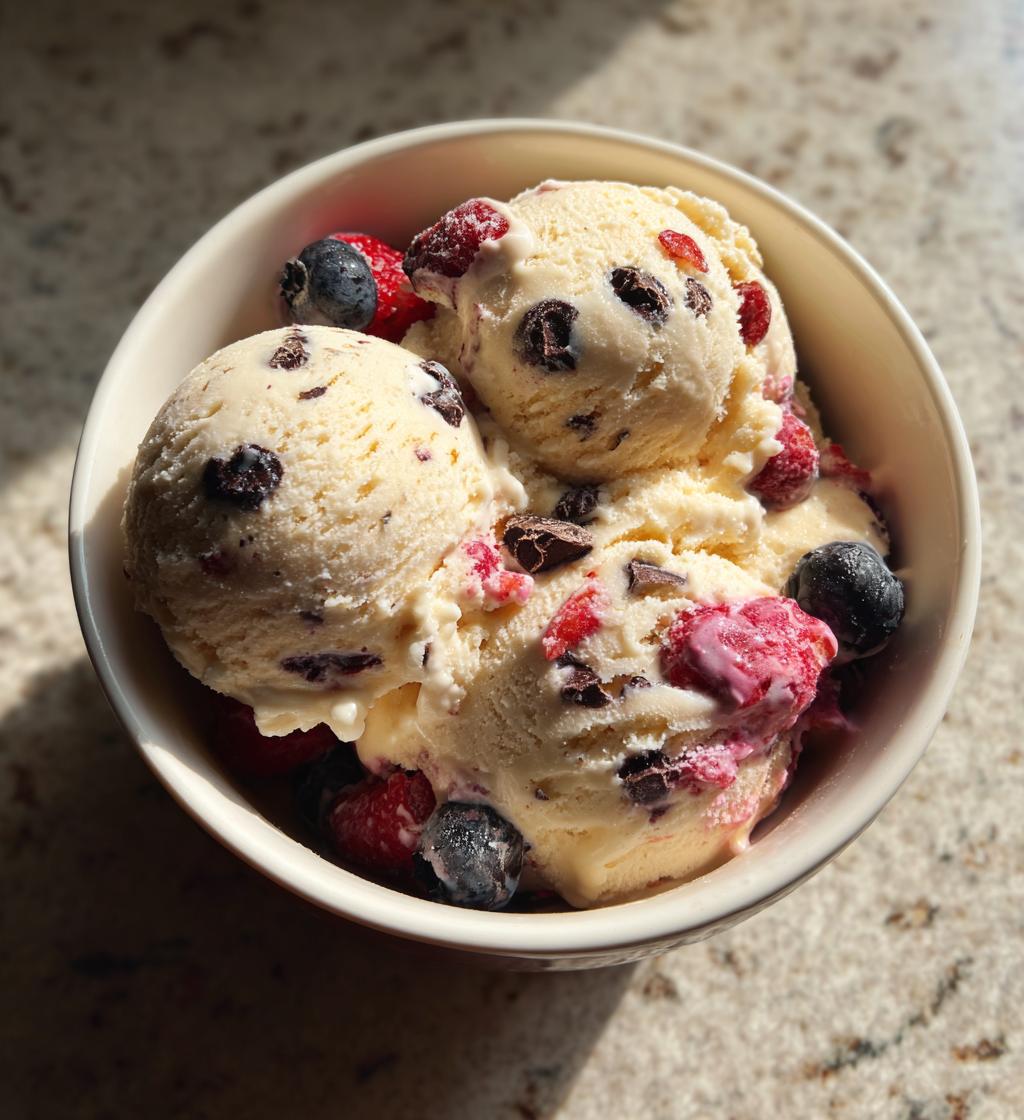
Who says you can’t enjoy ice cream while keeping it healthy? With my collection of *Ninja ice cream recipes healthy*, you can whip up delicious frozen treats without the guilt! Thanks to my trusty Ninja blender, making creamy, dreamy ice cream has never been easier or faster. Just a few simple ingredients and a little blending magic, and you’ll have a delightful dessert that satisfies your sweet tooth while nourishing your body.
Imagine indulging in a bowl of rich, velvety ice cream that’s packed with nutrients instead of empty calories. It’s the best of both worlds! Whether you’re looking for a refreshing snack on a hot day or a wholesome dessert for the family, this recipe has you covered. So, grab your Ninja blender and let’s dive into the wonderful world of healthy ice cream!
Ingredients List
To make this scrumptious healthy ice cream, you’ll need just a few simple ingredients. Here’s what you’ll gather:
- 2 ripe bananas: Choose bananas that are nice and spotty! Their natural sweetness makes for a creamy base. Slice them up and freeze for at least 2 hours before blending.
- 1 cup almond milk: This adds creaminess without the added calories of regular milk. You can also use unsweetened almond milk to keep it light and healthy.
- 1/2 cup Greek yogurt: Look for plain, unsweetened Greek yogurt for that rich texture and protein boost. It’s key to making your ice cream creamy and satisfying!
- 1/4 cup honey or maple syrup: You can adjust this based on your sweetness preference. Honey brings a lovely floral note, while maple syrup adds a hint of caramel flavor.
- 1 tsp vanilla extract: This little addition elevates the flavor and gives it that classic ice cream taste. Trust me, it’s a must!
- 1/2 cup mixed berries: Fresh or frozen, these add a burst of fruity goodness. Think strawberries, blueberries, or raspberries – whatever you love!
- 1/4 cup dark chocolate chips: Optional, but highly recommended! These little gems add a delightful crunch and a rich chocolatey flavor that beautifully complements the fruit.
Gather these ingredients, and you’re on your way to creating a frozen treat that’s not just delicious but also nourishing. Let’s get blending!
How to Prepare Ninja Ice Cream Recipes Healthy
Now that you’ve got all your ingredients ready, let’s dive into how to prepare this delightful healthy ice cream. The process is simple and super fun, especially with a Ninja blender doing most of the heavy lifting! Follow these easy steps to create your frozen masterpiece.
Step-by-Step Instructions
- Freeze the bananas: Start by slicing your ripe bananas into small pieces. Spread them out on a baking sheet lined with parchment paper for easy freezing. Pop them in the freezer for at least 2 hours until they’re nice and firm. This is crucial for that creamy texture!
- Blend it all together: Once your bananas are frozen, grab your Ninja blender! Add the frozen banana slices, 1 cup of almond milk, 1/2 cup of Greek yogurt, 1/4 cup of honey or maple syrup, and 1 tsp of vanilla extract. Blend on high until everything is smooth and creamy. You might need to stop and scrape down the sides of the blender to make sure everything gets incorporated. It should take about 1-2 minutes of blending to get that perfect consistency.
- Fold in the fun: After blending, it’s time to add in your 1/2 cup of mixed berries and 1/4 cup of dark chocolate chips. Gently fold these into the mixture using a spatula. This way, you keep those lovely fruit bits and chocolate chips intact!
- Freeze the mixture: Transfer your ice cream mixture into a container (I recommend one with a tight-fitting lid) and smooth the top with a spatula. Pop it into the freezer and let it chill for at least 3 hours. This step is essential to get that scoopable ice cream texture.
- Scoop and enjoy: After your ice cream has set, grab a scoop and serve it up in bowls! You can enjoy it as is, or top it with more berries, a drizzle of honey, or even a sprinkle of nuts for some added crunch. Yum!
And there you have it! Your very own healthy ice cream made in a snap with a Ninja blender. Just remember, the key to that creamy texture lies in freezing the bananas properly and blending until smooth. Enjoy every delicious bite!
Why You’ll Love This Recipe
Let me tell you, there’s so much to love about this healthy ice cream recipe! First off, it’s all about the ease of preparation. With just a handful of ingredients and a Ninja blender, you can whip up a delicious and creamy treat that’s ready to enjoy in no time. Seriously, making ice cream has never been this simple!
Plus, you’re using nutritious ingredients that not only taste amazing but also do wonders for your body. Those ripe bananas provide natural sweetness, while Greek yogurt adds creaminess and protein. And let’s not forget the mixed berries, bursting with antioxidants and flavor! You can indulge without feeling guilty, knowing that you’re treating yourself to something wholesome.
What really excites me, though, is the endless customization options! You can mix and match fruits, adjust the sweetness, or even add fun mix-ins like nuts or coconut flakes. Feeling adventurous? Try adding a swirl of peanut butter or chocolate sauce! The possibilities are as limitless as your imagination, making each batch a unique creation.
So whether you’re hosting a summer gathering, treating the kids, or just craving a sweet snack, this healthy ice cream recipe is sure to impress. Trust me, you’ll be making it again and again!
Tips for Success
To make sure your healthy ice cream turns out perfectly every time, I’ve got some tried-and-true tips that will elevate your ice cream game! Trust me, these little nuggets of wisdom will make all the difference in your blending and freezing process.
Perfecting the Blend
When using your Ninja blender, it’s all about the order of ingredients. Start with the softer ones like frozen bananas and almond milk before adding the thicker Greek yogurt and sweeteners. This ensures a smoother blend and helps everything mix together more easily. If your mixture seems too thick, don’t hesitate to add a splash more almond milk to help it along.
Blend on high and don’t rush it! I usually blend for 1-2 minutes, but stopping occasionally to scrape down the sides ensures every bit gets incorporated. You want that creamy, dreamy texture that makes each scoop irresistible!
Freezing Like a Pro
Now, let’s talk freezing. Make sure your ice cream mixture is in a container with a tight-fitting lid to prevent ice crystals from forming. I like to use shallow containers because they freeze more evenly, which helps achieve that perfect scoopable texture. If you’re short on time, a loaf pan works well, too!
For best results, allow the ice cream to freeze for at least 3 hours, but if you can wait overnight, even better! This lets all those flavors meld together beautifully. Just remember to let it sit out for a few minutes before scooping, as it can get pretty firm in the freezer.
Storing Leftovers
If you happen to have any leftovers (which is rare in my house!), store them in the freezer with a piece of parchment paper pressed against the surface of the ice cream. This helps keep the air out and maintains that creamy texture for longer. Just be sure to consume it within a week or two for the best flavor and consistency!
With these simple tips, you’ll be a healthy ice cream-making pro in no time. Enjoy the process, and most importantly, savor every delicious bite!
Variations on Ninja Ice Cream Recipes Healthy
The beauty of making your own healthy ice cream is that it’s super customizable! You can have fun experimenting with different fruits, sweeteners, and add-ins to create a unique flavor that speaks to your taste buds. Here are some delicious variations to inspire your creativity:
- Fruity Delights: Swap out the mixed berries for other delicious fruits! Try using mango for a tropical twist, or peaches for a sweet summer flavor. You can even mix in some pitted cherries or diced apples. Just make sure to freeze them beforehand for that creamy texture!
- Nutty Goodness: Want to add some crunch? Toss in a handful of chopped nuts like almonds, walnuts, or pecans when you fold in the berries and chocolate chips. You could also blend in some almond or peanut butter for a rich, nutty flavor that pairs perfectly with the sweetness of the bananas.
- Chocolate Lovers: If you’re a chocolate fanatic, you can increase the dark chocolate chips or even blend in some cocoa powder for a chocolate banana ice cream. Just remember to adjust the sweetness since cocoa can add a bit of bitterness!
- Sweetener Swaps: Feel free to experiment with different sweeteners. Agave syrup is a great alternative to honey or maple syrup, and it’s also vegan-friendly. If you want a lower-calorie option, try using stevia or monk fruit sweetener. Just adjust to taste, as they can be sweeter than traditional sweeteners.
- Flavor Infusions: Want to take it up a notch? Add a teaspoon of cinnamon or a splash of almond extract for a warm, comforting flavor. You can also try infusing your ice cream with fresh mint or basil for a refreshing twist. Just toss in the herbs while blending for a burst of flavor!
Remember, the possibilities are endless! Don’t be afraid to mix and match flavors or try new combinations. The more you experiment, the more delightful creations you’ll come up with. So, grab those ingredients and let your imagination run wild as you make your own signature healthy ice cream! Enjoy the process and, of course, the delicious results!
Nutritional Information
Here’s the scoop on the nutritional goodness packed into each serving of this healthy ice cream! Keep in mind that these values are estimates and can vary based on the specific ingredients you choose. But overall, you’re treating yourself to a delightful dessert that’s both satisfying and nourishing!
- Serving Size: 1/2 cup
- Calories: 150
- Sugar: 10g
- Sodium: 50mg
- Fat: 5g
- Saturated Fat: 1g
- Unsaturated Fat: 4g
- Trans Fat: 0g
- Carbohydrates: 25g
- Fiber: 3g
- Protein: 4g
- Cholesterol: 5mg
With this combination of wholesome ingredients, you can indulge in your ice cream cravings without any guilt. Enjoy every creamy, fruity bite knowing you’re treating yourself right!
FAQ Section
Got questions about making this delicious healthy ice cream? Don’t worry, I’ve got you covered! Here are some common inquiries I often hear, along with my best answers to help you on your ice cream-making journey.
Can I use other fruits aside from bananas?
Absolutely! While bananas are key for that creamy texture, you can experiment with other fruits too. Just keep in mind that you’ll want to blend them with something that has a similar consistency. Frozen avocados or even silken tofu can work wonders for creaminess if you want to mix things up!
How long does this ice cream last in the freezer?
If you manage to have leftovers (which is a rare occurrence in my house), this healthy ice cream can last in the freezer for about 1-2 weeks. Just make sure to store it in an airtight container to prevent freezer burn. I recommend pressing a piece of parchment paper against the surface before sealing the lid to lock in that creamy texture!
Can I make this recipe vegan-friendly?
You’re in luck! This recipe is already vegan-friendly since it uses almond milk and can easily be made with maple syrup instead of honey. Just ensure that your Greek yogurt is dairy-free if you want to keep it plant-based. There are plenty of delicious vegan yogurt options available these days!
What if I don’t have a Ninja blender?
No worries at all! While I love my Ninja blender for its power and efficiency, you can use any high-powered blender or even a food processor. Just be patient and blend in smaller batches if necessary, as this can help achieve that smooth, creamy texture!
Can I adjust the sweetness of the ice cream?
Of course! You can absolutely adjust the amount of honey or maple syrup to suit your taste. Start with less and add more slowly, tasting as you go. If you prefer a sugar-free option, consider using stevia or monk fruit sweetener. Just remember to read the packaging for proper conversions!
Is this ice cream suitable for kids?
Yes! This healthy ice cream is perfect for kids. It’s packed with wholesome ingredients and a deliciously sweet flavor that they’ll love. Plus, it’s a fun way to sneak in some nutrients while satisfying their sweet cravings!
If you have any more questions or need further assistance, feel free to ask! I’m always here to help you enjoy your healthy ice cream adventures!
Serving Suggestions
When it comes to enjoying your healthy ice cream, the fun doesn’t stop at just scooping it into a bowl! There are so many delightful ways to serve and enhance this creamy treat that will make it even more special. Here are some of my favorite serving suggestions:
- Fresh Fruit Toppings: Nothing beats the freshness of a few extra berries on top! I love adding sliced strawberries, blueberries, or raspberries for a pop of color and flavor. You could even try some diced mango or kiwi for a tropical twist!
- Nutty Crunch: For a little extra texture, sprinkle some chopped nuts like almonds, walnuts, or pistachios on top. They add a lovely crunch that pairs wonderfully with the creamy ice cream.
- Drizzle of Honey or Maple Syrup: A light drizzle of honey or maple syrup adds a touch of sweetness that can elevate each scoop. Just a little goes a long way in enhancing the flavor!
- Chocolate Sauce: If you want to indulge a bit, drizzle some homemade or store-bought chocolate sauce over your ice cream. It’s a delightful combination that chocolate lovers will adore!
- Coconut Flakes: For a tropical vibe, top your ice cream with toasted coconut flakes. They add an irresistible flavor and a bit of chewiness that complements the smoothness of the ice cream.
- Serve with a Side of Cookies: Pairing your ice cream with some healthy homemade cookies, like oatmeal or almond flour cookies, makes for a delicious dessert combo that’s sure to impress!
- Ice Cream Sandwiches: Get creative and use your healthy ice cream as the filling for ice cream sandwiches! Just grab some whole-grain cookies or graham crackers, scoop the ice cream between them, and you’ve got yourself a fun treat!
Feel free to mix and match these suggestions or come up with your own signature pairings! The best part about this healthy ice cream is that it’s so versatile, allowing you to enjoy it however you like. So go ahead, get creative, and savor every delightful bite!
Print
Ninja Ice Cream Recipes Healthy: 5 Joyful Treats to Create
- Total Time: 3 hours 10 minutes
- Yield: 4 servings 1x
- Diet: Vegan
Description
A collection of healthy ice cream recipes made with a Ninja blender.
Ingredients
- 2 ripe bananas
- 1 cup almond milk
- 1/2 cup Greek yogurt
- 1/4 cup honey or maple syrup
- 1 tsp vanilla extract
- 1/2 cup mixed berries
- 1/4 cup dark chocolate chips
Instructions
- Slice the bananas and freeze them for at least 2 hours.
- In the Ninja blender, combine frozen bananas, almond milk, Greek yogurt, honey, and vanilla extract.
- Blend until smooth and creamy.
- Fold in mixed berries and chocolate chips.
- Transfer the mixture to a container and freeze for at least 3 hours.
- Scoop and serve your healthy ice cream.
Notes
- Use any fruit for variations.
- Adjust sweetness to your preference.
- Store leftovers in the freezer.
- Prep Time: 10 minutes
- Cook Time: 0 minutes
- Category: Dessert
- Method: Blending and Freezing
- Cuisine: American
Nutrition
- Serving Size: 1/2 cup
- Calories: 150
- Sugar: 10g
- Sodium: 50mg
- Fat: 5g
- Saturated Fat: 1g
- Unsaturated Fat: 4g
- Trans Fat: 0g
- Carbohydrates: 25g
- Fiber: 3g
- Protein: 4g
- Cholesterol: 5mg
Keywords: ninja ice cream recipes healthy